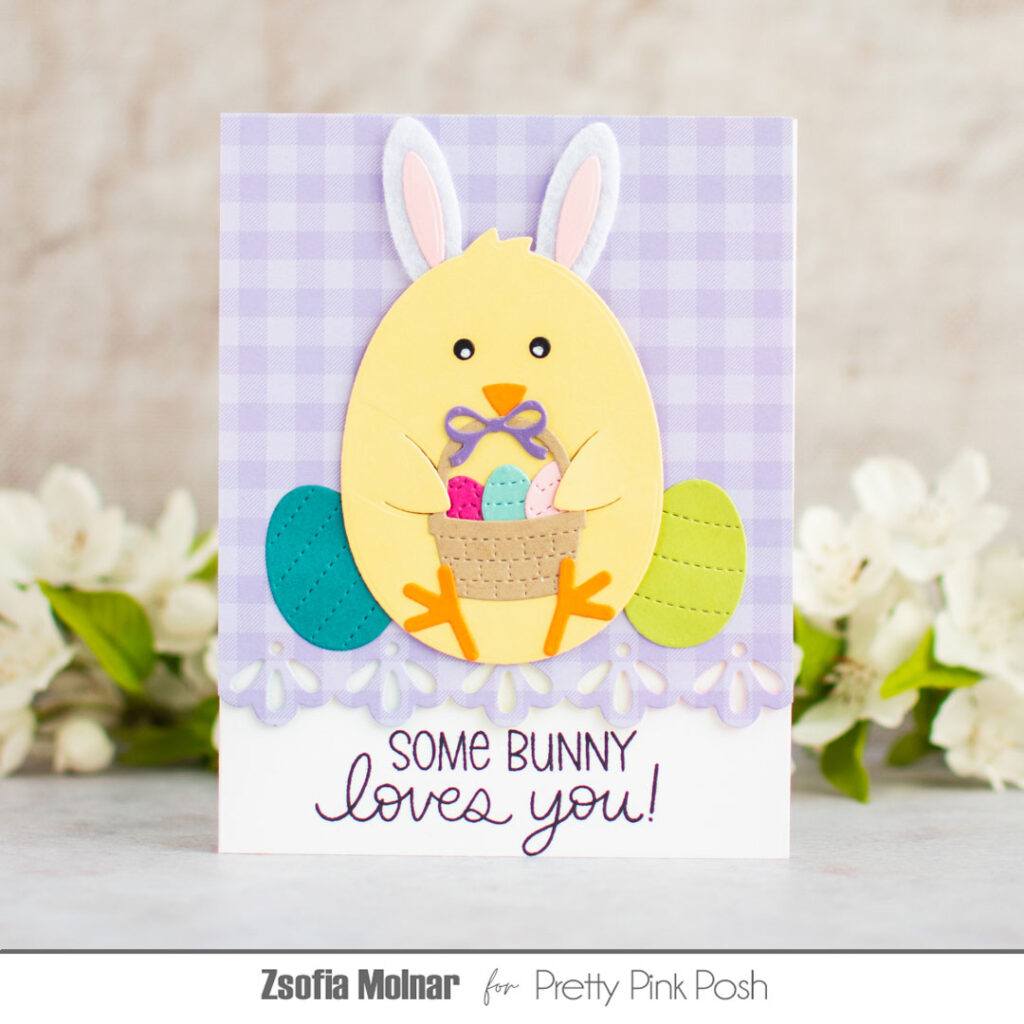
Spring Bunny Mugs
Hello crafty friends, Marine here, I’m very happy to be back with this extra colorful card featuring a mash-up of new items, such as the Easter Bunny Mugs, with older ones, such as the Doily Borders. I’ve had this border die set for a long time, and it was fun to finally use it!
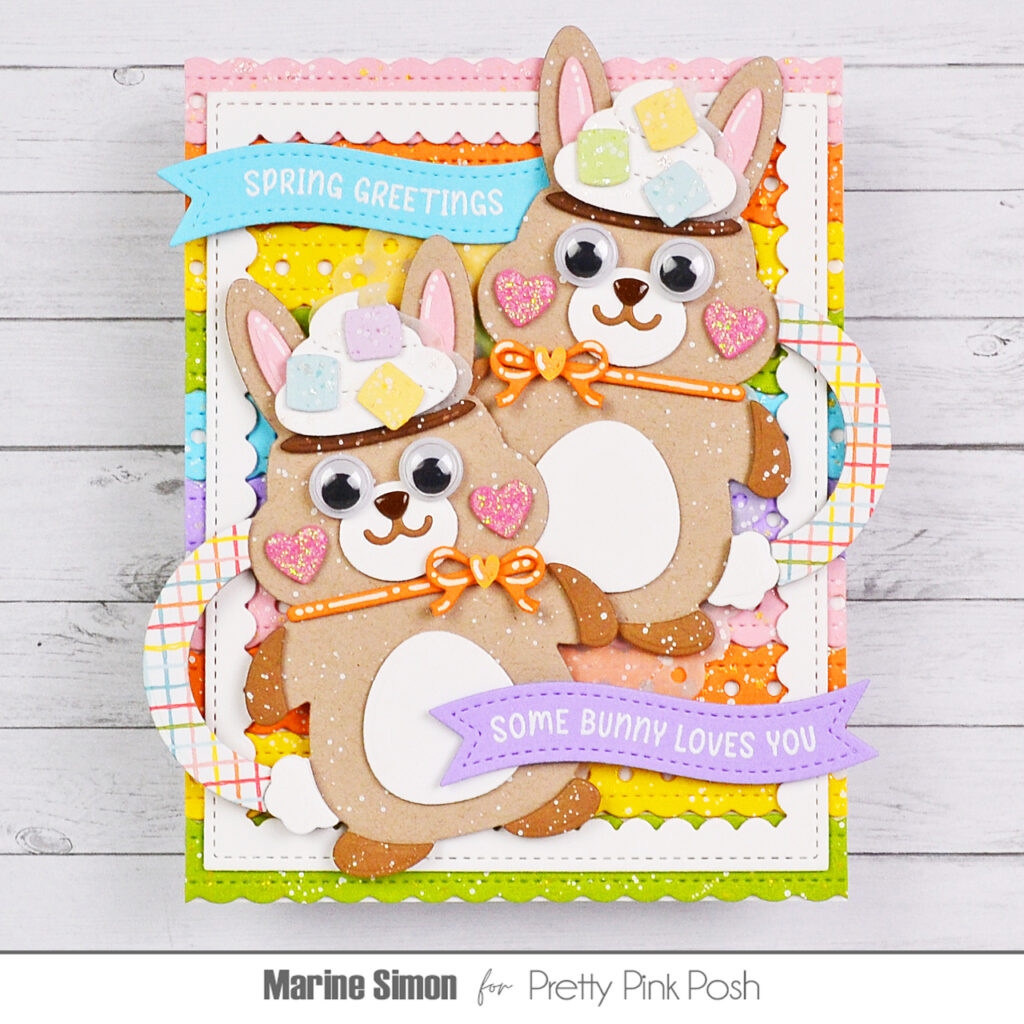
I started off by creating the background, and I knew that my Easter Bunny Mugs would be mostly neutrals, so that’s why I went for a bright and bold background. I cut multiple Doily Borders out of pink, orange, yellow, green, blue and purple cardstock, mixed copic opaque white ink with water and added white splatters all over the borders. I did the same with liquid stardust because I can’t help myself but adding sparkles to all my cards, and when my Doily Borders were dry, I attached them one below each other to a 5,5 x 4,25 inches white panel using 1mm foam squares. Next I cut a large Scallop Frame out of white cardstock, and stuck it to the colorful Doily Borders using 1mm foam squares again.
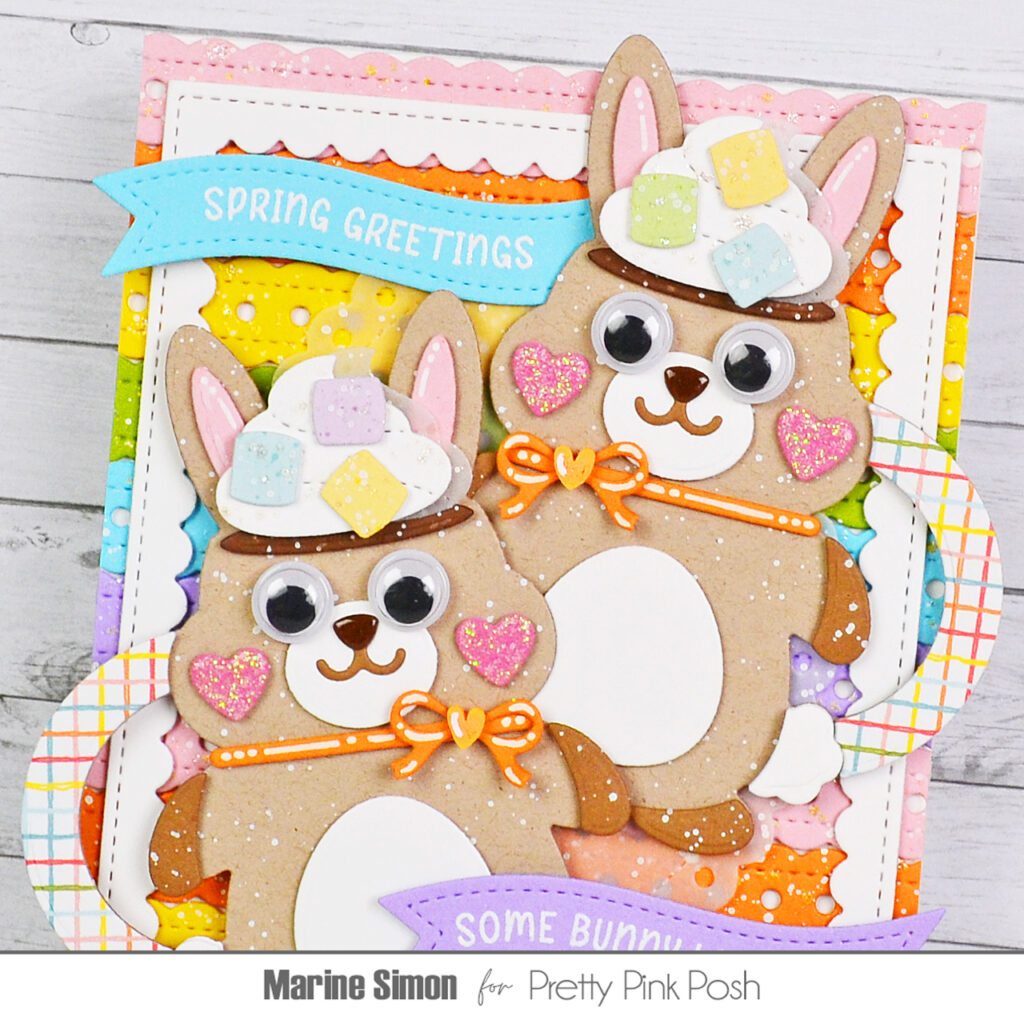
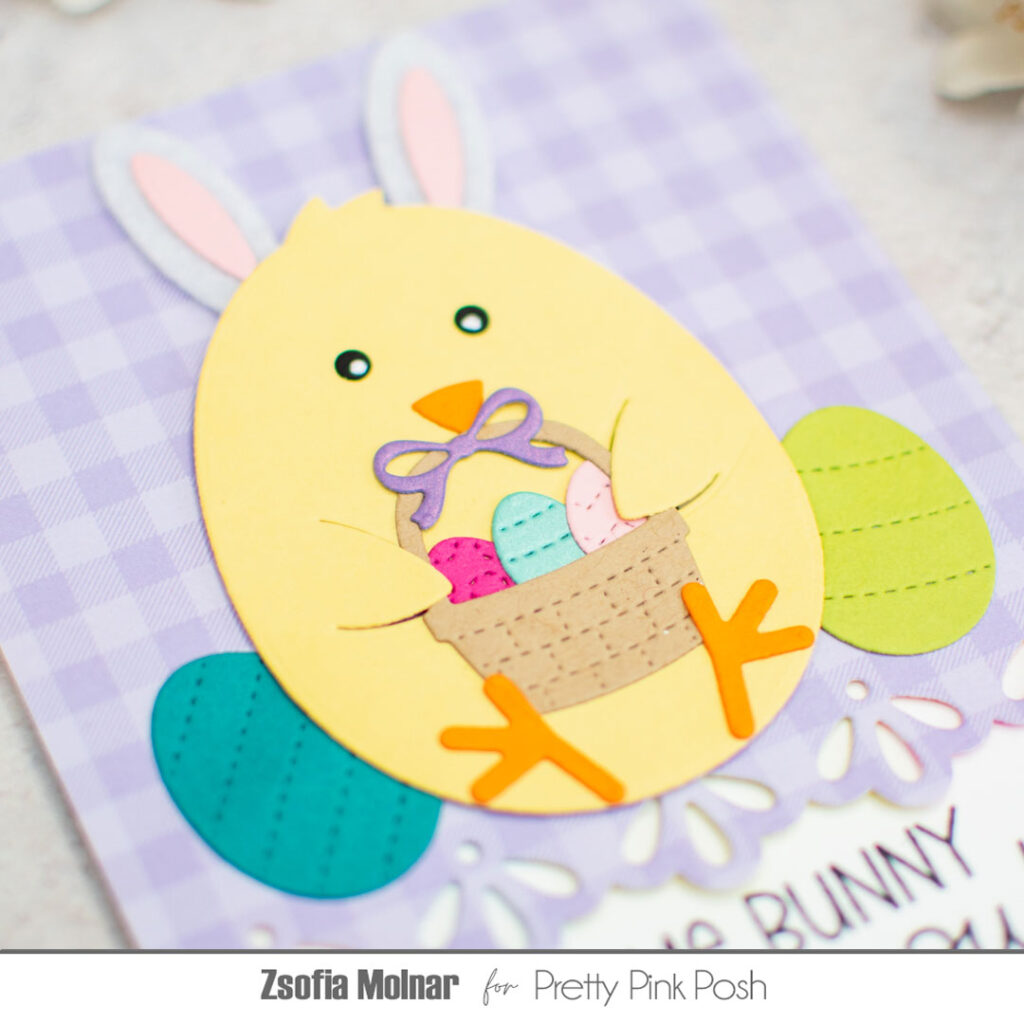
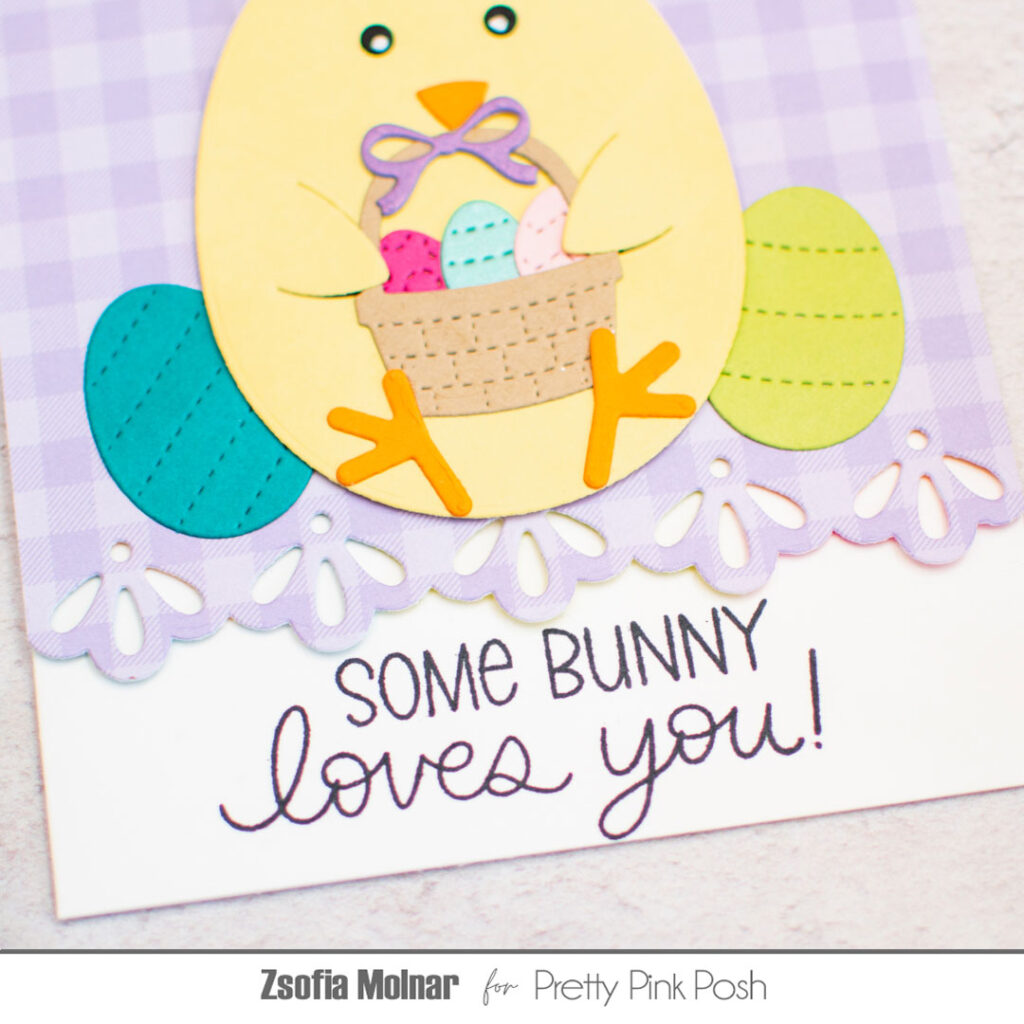
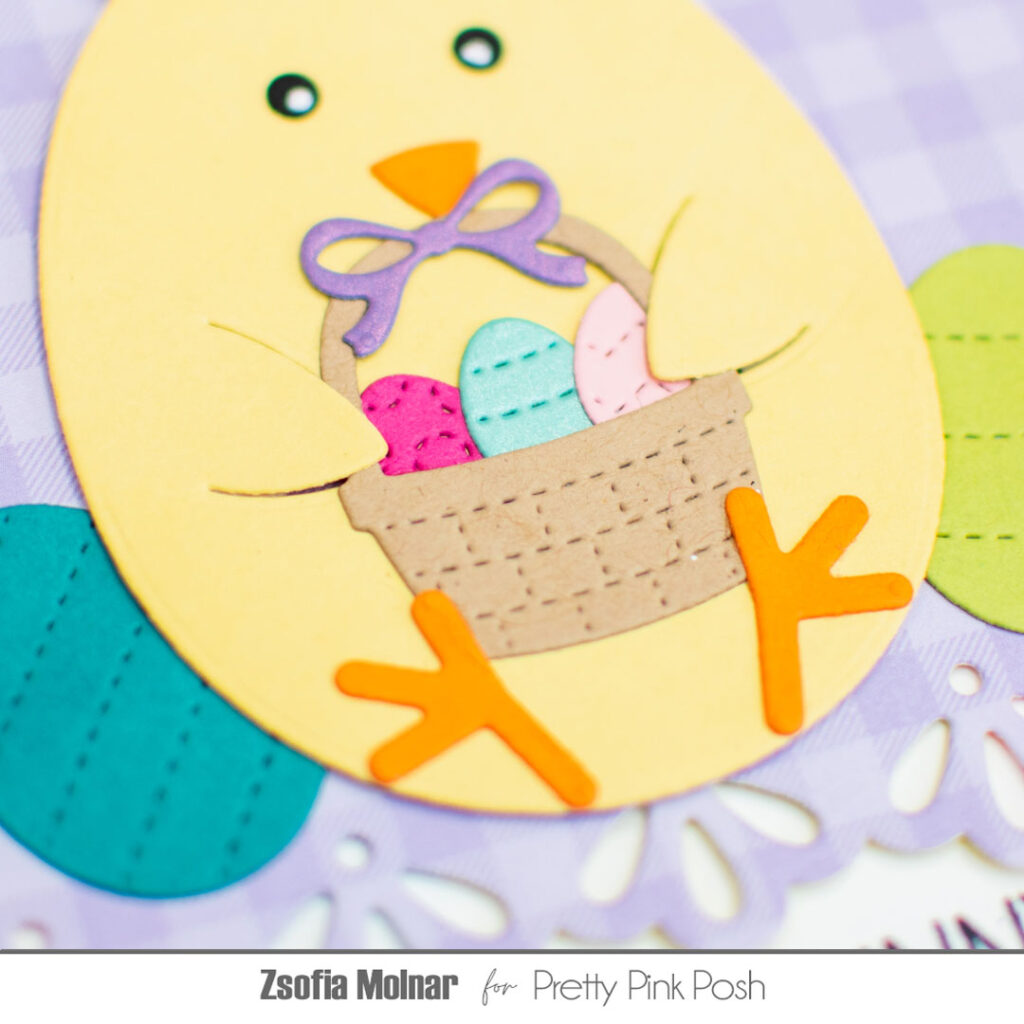
I cut the Easter Bunny Mugs items out of colored cardstock, pattern papers and vellum, added texture to each element using liquid stardust, copic opaque white ink and a white gel pen, and then I assembled my mugs using 1mm foam squares. The only items that don’t belong to the Easter Bunny Mug die set are the heart cheeks, collars and bunny white snouts. I used a Valentine Bucket Additions die to cut the hearts, Spring Mug Additions dies to cut the collars and the bow ties, and a Bear Holder die to cut the bunny white snouts.
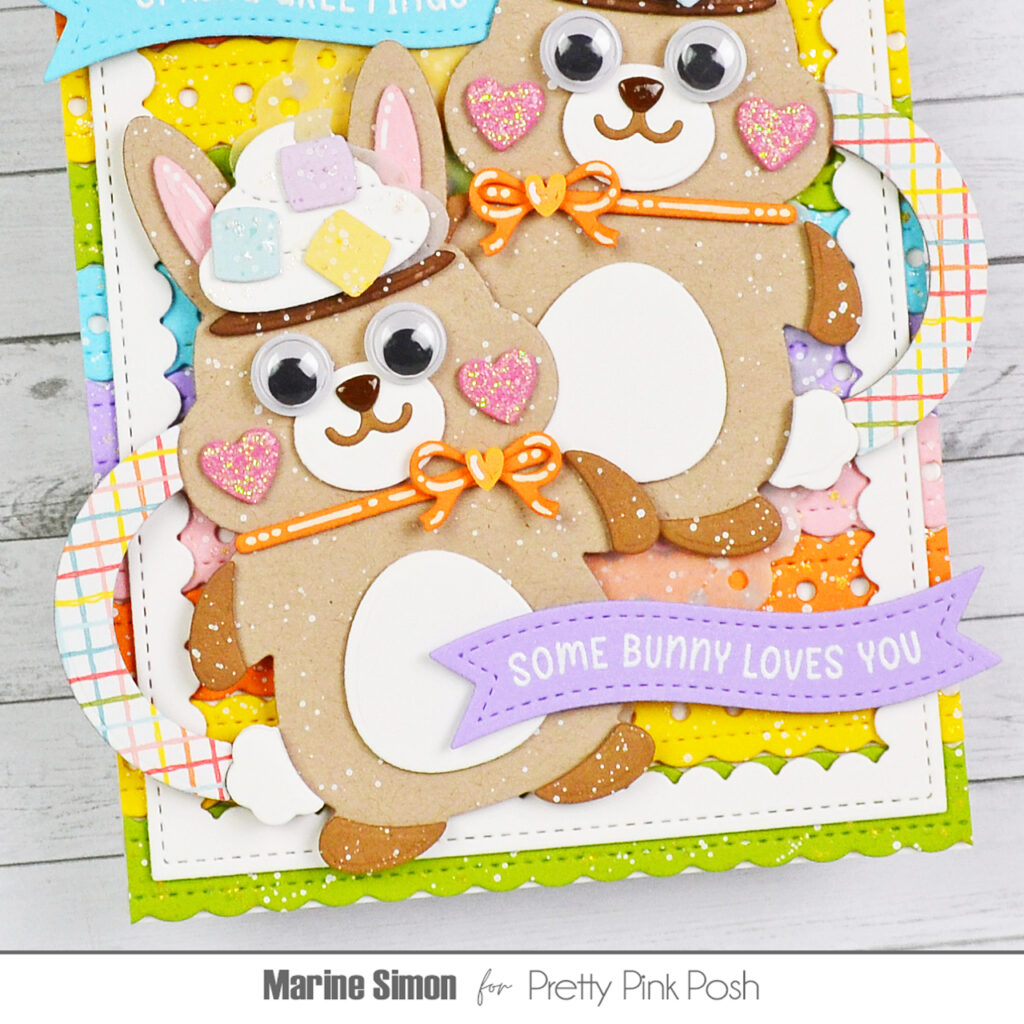
I gave both of the bunny mugs a pair of googly eyes to make them extra cute, applied glossy accents to their nose and white blizzard nuvo drops to their cheeks, and picked orange hearts from the Colorful Hearts confetti mix that I glued in the center of each bow tie. To tone down my colorful background a bit, I cut a large Eyelet Oval panel out of vellum, added white splatters to it and attached it right in the middle of my Doily Borders panel. Next I stuck the Easter Bunny Mugs using 1mm foam for one and 2mm foam squares for the other, and then stamped two Easter Banner Greetings. I white heat embossed “Spring Greetings” on blue cardstock and “Some Bunny Loves You” on purple cardstock, used a Banner Greetings 3 die to cut the first one and a Banner Greetings 1 die to cut the second one, and finally attached them both to my card using foam squares.
And that’s it! You know I’m a huge fan of mixing and matching my sets from different years, it’s a super fun exercise, so I hope that my card has inspired you to do it as well. Thanks so much for stopping by, and see you next time.